# Underbelly
In the station, we caught our breath, but it wasn't long before we could feel them watching. All we could do then was await the inevitable.
Objectives:
- Open the doors leading to the employee area.
- Descend to B2F. You will need a key that's inside a password-secured locker.
- Obtain both Founders' emblems. You will need to stop the leakage in B2F in the process.
- Defeat Gigabite.
- Hurry to the subway car before it departs!
- If you do not get to the subway car in time, find a way through the vents to the surface'
# Lockpick solutions (Alyssa)
| Location | Easy | Normal | Hard | Very Hard |
|---|---|---|---|---|
| West Concourse → Employee Passage1 | - | - | W | W |
| East Concourse → Employee Passage1 | - | - | I | P |
| Employee Passage → Break room (Front) | - | - | W | I |
| Employee Passage → Break room (Back) | - | - | I | I |
| Drawer in Control Room | P | P | P | S |
# Control room drawer
A little help
These patterns may help you read the code for the drawer more easily:
- 2 letters → 1
- 3 letters → 7
- 5 letters → 0
- 3 letters, 2 letters → 4
- 4 letters, 2 letters → 3
- 5 letters, 2 letters → 8
- 6 letters → 2, 5, 6 or 9
- If second letter comes after the first in alphabetical order → 2
- If first two letters are between I and P → 9
Example:
A B R Q   I J
    C D T
    F V
P O G H X W
- First row has 4 letters, 2 letters → 3
- Second row has 3 letters → 7
- Third row has 2 letters → 1
- Fourth row has 6 letters, first two letters are between I and P → 9
Thus, in this case, the drawer code is 3719.
# Ticket areas and subway platform
You will start either in the west or east entrance. A blood pack may spawn in the east entrance; make sure you pick it up. Go down the stairs, and explore the ticket areas for items; be sure to look in blind spots, you might find a FAS or an alcohol bottle. If you are in the east ticket gate, read the document in the trash can to unlock a drawer in a few minutes. Make sure to explore the stairs opposite of where you came from, since there may be more goodies next to the rubble. Exit to the west/east concourse.
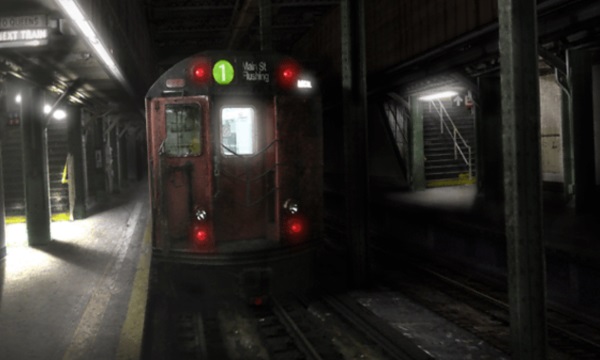
If Alyssa is on the team, she should unlock the doors leading to the employee area. Otherwise, start tackling the doors, being careful of zombies. If you see you're going to be attacked, enter and exit the restrooms to reset zombie positions. After opening the door, traverse the hallway to unlock the other door, exit the area and descend the stairs to the platform. Go inside the subway car if you want some goodies, then return to the platform. If you happen to have a blood pack, use it as close to the subway car doorway as possible. Now enter the east tunnel. If you need anything from this room, be sure to leave another object so as not to lose item slots. At the far end there's a note with a password: make sure to read it, then return to the west/east concourse. Pick up any useful items in the restrooms, then return outside. Knock open the door if you haven't already, then enter the employee area.
# The employee area
From now on, be on the lookout for newspapers and alcohol bottles, along with the lighter. Molotov cocktails are very useful against the scenario's boss.
Alyssa should make quick work of the doors leading to the locker room. If not, be prepared to tackle them while avoiding zombies. As before, you can enter the restrooms to reset zombie positions, but this is not recommended since the hallways are narrow. Instead, cooperate with teammates, or shoot the doors with handguns. Note that you only need to unlock one of the doors, since the other can be unlocked from the other side. Once in the locker rooms, interact with the middle right locker, and input the password you read in the east tunnel; collect the B2F key. If you explore this room, you can find some goodies, which may range from handgun ammo to recovery pills. Make sure to pick up the hidden item next to the vending machines.
Exit through the door closest to the lockers, then enter the control room. There are some healing items, and most importantly, a document which contains instructions on a set of emblems. If you read the document in the east ticket gate, you can input the correct code in the drawer next to the control panel. There may be a recovery pill, or shotgun ammo. There is also a locked drawer that Alyssa can unlock for a weapon or a FAS. Exit the control room, and follow the wall on your character left to find a door you can open with the B2F key. Enter, then descend the large set of stairs, collecting any useful items you might find. Enter the B2F passageway.
# Stopping the leakage: the first emblem
Follow the wall on your character's right and enter the light brown door, avoiding zombies in the way. Pick up a valve handle, then exit the way you came. Now you need to stop the flow in the pump room. The safest way to get there is from the stairs closest to the B2F passageway entrance. One ally should stay in the B2F passageway in order to distract the zombies away from the pump room. Once inside, go up the steps and use the valve handle to trigger a cutscene. Exchange your valve handle for whatever item is closest, typically a blood pack or a herb. Exit the room, avoiding any zombies that might have entered. If David is on the team, he should use all his duct tape to stop the leakage now, and avoid a lot of backtracking later. Once the leakage is fixed, use the valve handle again. In any case, collect the ammo on the top left corner and exit the room.
You will notice a yellow emblem has appeared outside the pump room. If you already fixed the leakage, pick the Founders' Emblem (Werner) now, leaving the valve handle behind. In any case, return to the room where you first found the valve handle, and use the switch there to active the emergency power supply. Exit the room and return to the employee area. From now on, it is very important that you do not approach the subway car. If you do, you will trigger a cutscene and the level will be filled with fleas, which will make your second trip to the pump room very difficult.
After you enter the employee area, follow the right wall (your character's left), to find another control panel room. This room contains a very entertaining puzzle: you need to switch the number on the panels so as to add 10 in each of them. You can only move a number which is connected to the panel which currently has no number. You can practice around in this lil' gadget; there are two patterns per difficulty level.
Quickly solve the puzzle and pick up whatever item is there left of the panel. Exit this room, then enter the now unlocked door next to the one that leads to the stairwell. Inside the storage room, pick up any goodies and push the heavy box to the right; If Mark is not on the team, you will need two people; pick up the weapon here. If David already fixed the leakage in B2F, you can now proceed to the platform, activate the cutscene, and use the first emblem; skip the next paragraph.
If you haven't fixed the leakage yet, pick up the duct tape inside the storage room, the return to the B2F passway. Enter the pump room and use the duct tape to fix the leakage. Now go up the steps, pick up the valve handle, and use it on the pump. Exit the room and pick up the Founders' Emblem (Werner) if you haven't already. Return to the employee area, and go to the platform. Activate the cutscene and use the emblem on the subway car's right side.
# The subway crash and the second emblem
After the cutscene plays, bites and megabites will have replaced most zombies. If you have a blood pack and haven't used it, now's the time: get as close to the subway car doorway as possible, then drop the pack to attract bites. In any case, another pair of cutscenes will soon play. If you didn't stop the leakage downstairs, the platform will be filled with smoke, reducing your health and rising your virus gauge continuously until you exit. You will also not be able to proceed with the scenario, so if you haven't done it already, follow the instructions above.
After the car crash cutscene, go to the platform's southeast area. There may be a pesticide spray on the area; make sure you collect it. You will find the Founders' Emblem (Oral) lying next to the wrecked car. Use it on the left side of the non-crashed subway car. At this moment, the rest of the team should be on the east tunnel, ready for the boss battle. Enter the subway car, and interact with the driver's seat to activate a boss battle.
# Boss battle: Gigabite
Gigabite is the weakest boss in File #2, though he's no slouch. He's very weak to Molotov cocktails and the pesticide sprays. He has three basic attacks. He will summon rolling gigabites when he stands on his back feet; avoid them by moving to the right of the arena, close to some transit barriers. He will perform two sweeps with his front feet; get away from him to avoid it. Lastly, he will occasionally sidestep, though this attack does not do much damage. He will be accompanied by three megabites, which will make quick work of you if the team doesn't kill them. Megabites do respawn after a while, so after dealing with them, start attacking the boss immediately.
Characters with a high rate of fire (e.g.: Kevin) should attack with Molotov cocktails, while others (e.g.: Yoko) should use pesticide sprays. If you dare, you can position yourself directly under Gigabite's belly and attack with the shotgun for great damage. Otherwise, the safest spot is close to the transit barriers on the right. After a while, Gigabite will be defeated.
You will hear the announcement that the train will depart soon. Hurry to the subway car, and wait inside to end the scenario. If you did not make it in time (or decided against it,) keep reading.
# The long and winding road to the surface
If you did not finish the level, a new key will appear where the subway car was. Pick it up, then return to the west/east concourse. Enter the employee area, and go through the stairwell to B2F, taking care of the fleas. Some fleas might inflict Poison in addition to Bleed (yes, it is possible to have both Poison and Bleed at the same time.) Follow the wall on the right to enter the refuse dump, collect any useful items here, then go to the valve handle room. Use your newly found key in the door in front of the machine, then go through.
Go down the stairs, picking up any herbs and pesticide sprays you might find. Avoid or kill the fleas, then enter the door to the ventilation shaft. There is a ladder opposite the door you entered from; carefully avoid the megabite and go up this ladder. Once up, go to the left and use the switch on the red light to lower a scaffolding nearby. Carefully go down to the entrance, avoiding the megabite, and go up the ladder closest to the door. Take a turn left, up, and right, to find a ladder going down; cross the lowered scaffolding to pick up the train wheel.
Return to the last ladder, then keep going up; the path is straightforward from here. On the surface, there are lots of fleas and a slot for your newly found train wheel. Use it to lower a final ladder. Carefully go up this ladder to end the scenario.
← Wild Things Flashback →