# Hellfire
While avoiding blasts of flame, we proceeded through the smoke-encased hotel. We now knew the true meaning of "Hell."
Objectives:
- Find a red jewel, which will help reveal a secret passage later. You will need to find a silver key in the process.
- Activate the emergency power mechanism. You will need to find a gold key in the process.
- Use the red jewel on a secret mechanism to unveil an emergency elevator, which only works when the emergency power mechanism is active.
- At the hotel lobby, defeat Regis Licker and escape the Apple Inn through the main entrance.
# Lockpick solutions (Alyssa)
| Location | Easy | Normal | Hard | Very Hard |
|---|---|---|---|---|
| Locker in storeroom | S | S | W | 1 |
| Lounge stairs → 1F Apple Inn Hallway | I | I | P | S |
| Bathroom in room 102 | I | I | P | S |
| Bathroom in room 201 | S | S | 2 | W |
| Bathroom in room 202 | W | W | I | P |
Warning
- Trying to open the door to the storeroom on Very Hard will cause an explosion, putting your character in Danger.
- Trying to open this door on Hard will cause an explosion, putting your character in Danger.
Also, opening the door next to the crow windowsill will cause an explosion as well.
# Codes for the level
| Location | Codes | |||
|---|---|---|---|---|
| Safe in Room 101 | JIA | BAE | GGF | DCH |
| Door to Security Room | 2287 | 6354 | 5128 | 0721 |
Notes
The codes for the safe and security room go in pairs, that is, if e.g.: the safe code is BAE, the code for the security room door is 6354. These can be input at any moment (no need to read the corresponding files.)
# Getting inside the Apple Inn
Pick up any goodies here, look at the central structure for the map, then enter the boiler room. Interact with the body for a cutscene, and pick up the handgun nearby. Now you have two options for proceeding: you can either return to the start and enter the Apple Inn corridor; if you do, skip the next two paragraphs. Or, if you enjoy risks, go up the ladder and continue through the rather straightforward path. Note that you are now in 3F. By the way, you can pick up mementos from the two dead guys, but they don't serve any real purpose in the scenario proper. Note that after the cutscene, the ladder will be broken if you exit the boiler room.
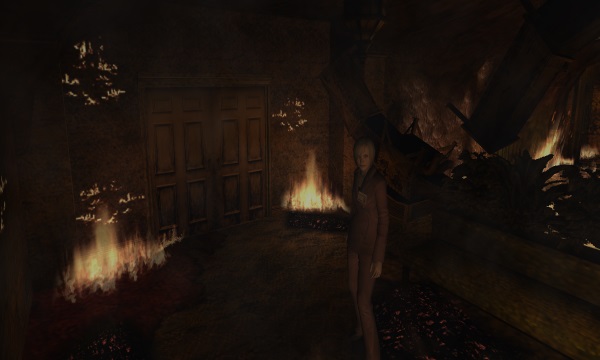
Enter the corridor, and immediately avoid the approaching zombie. Follow the hallway and enter the next area. Pick up the red herb, hidden behind a pillar. Do not open the door next to the window: if you try to open it, you will trigger a gas explosion, possibly putting you on Danger. Now climb the ledge, and as soon as the camera switches, kill the crow. There is a green herb nearby. You can abuse a little glitch in this area, if you wish: follow the hallway straight after you enter this room, and as soon as the camera changes angles, aim your handgun. You will see your character is pointing at something. Shoot a couple of bullets to kill a second crow.
Now, approach the windowsill and advance, ignoring the zombie in the window. Traverse the corner. When you get close to the second window, press the aim button to hang from the windowsill. Keep going, and as soon as go past the fire window, mash the action button to climb up again, before a second crow gets you (if you didn't use the exploit described above.) Keep doing this drop-and-climb business while advancing through the windowsill until you reach a platform. The crow may commit suicide here by flying into the fire, making your journey easier. Go down the ladder, and enter the door to the next area.
# Path to the security office
You will need to find a red jewel, and turn the emergency power on. These tasks can be done independently of each other. In the process, you might want to unlock the security room so you can easily navigate through the level. The easiest, most efficient way to do it is by far via a passcode. If you came from the crow route, you can wait until later; skip the next paragraph. Otherwise, after entering the Apple Inn, follow the hallway, past several doors, and go up the stairs to the second floor. There is a door with a card reader here.
If you happen to know the code to the security office, enter it to unlock the door. If not, enter the door on the northeastern corner, and go upstairs. Enter the Apple Inn square, and go through the closest door. The code is in a laundry cart. In any case, enter the now accessible security office, and interact with the double doors to also unlock them.
Crow routers may open the double doors to the security office via card key, and unlock the passcode door from inside. I don’t recommend it, though, since it’s inefficient and you may end up taking unnecessary damage. Skip this paragraph if you want to follow my advice. If you insist, or are a completionist, enter the door next to the smoke-emitter one. Pick up the herb and avoid the zombie while crossing this hallway, and enter the door here to find a very small room. Get more goodies, then open the door opposite to obtain the card key. Return all the way to the blue hall (northwestern passage 2,) and use the card key in the lector next to the double doors. Enter, unlock the other door, then return to the blue hallway.
If the security doors are unlocked, you can complete the next sections in any order you wish. I recommend going for the red jewel first (particularly for crow routers,) but it’s up to you; the guide will list the red jewel route first, then the emergency power route second.
# The red jewel
You should be outside the double doors leading to the security office. Follow the right wall, and enter a burning room with a box (owner's room.) Push it to create a hole in the floor. Read the many passcodes on the document down below. Exit the room, and walk a bit, picking up the shotgun under the sofa, if it’s there. Enter room 101, which is right of the sofa; dispose of the zombie if it’s there; you can even lock him inside the bathroom if you're sleazy enough. Read a document over the bed, which contains a hint for the password you need. Interact with the safe and input the correct code. Get the silver key from the safe and exit to the licker hallway. Unlock the door in the corner with the silver key.
Enter the 1F hallway. This area should be familiar for those that opted out of the crow route. The first door on the left is locked; ignore it. Go to the hallway end, and up the stairs to 3F. Open the first door on the right with your silver key, and exchange it for a red jewel, located on a bonsai-like decoration. Explore the room for goodies if you wish. Now it's a good time to unlock the security office (via passcode) if you haven't yet. Jump to the second paragraph on the previous section, and continue.
# The map puzzle
Find and enter room 204, located next to a set of stairs you've probably used before. Take note of the map on the wall, particularly the unlit numbers. You will need to enter certain hotel rooms, and activate a mechanism inside, to turn all lights on. Switches 1, 2 and 3 are located in 1F, close to the stairway. Switch 3 is inside room 104 (the closest room to the stairs) switch 1 is in room 102 (next to the simple-locked door,) and switch 1 is in room 103 (room in between.) Look for goodies when solving the puzzle, but mind the zombies.
When the entire map in room 204 is lit, a secret compartment will open on the opposite side. Take the gold key here, and some other goodies you might deem useful. Now, return to the licker hallway in 1F. If you didn’t unlock the silver key door, you will need to get there the long way; follow the instructions on the start of this section. In the licker hallway, go north, opposite the silver key door, and unlock the door on the wall with the gold key. There are some herbs nearby, but remember to walk so as to not alert the lickers. Enter the door you just unlocked, and solve the rather simple puzzle to activate the emergency power. Make your way back to the security office, via owner's room.
# Before the boss battle
By now, you should have the red jewel and the emergency power must be on. If not, follow their respective sections. Push the bookshelf next to the bust, and use the red jewel on the bust’s right. The secret hallway will open, and you will have access the lobby.
# Optional: goodies inside Apple Inn
Before going further, you may want to explore the hotel for goodies. I strongly recommend getting the shotgun, if you didn’t get it in the licker room. The possible shotgun locations (not counting the licker room) are as follows:
# Room 30X
Exit the security room through the single door, and enter the lounge stairs. Go upstairs, exit the room, and then enter the door immediately right. Dispose of the zombie, if there is one. Smash the cracked wall and go through the newly created crawlspace. The shotgun may spawn here. You can unlock the door for a shortcut if you wish, though it’s not really needed.
# The burning passageway
Enter the lounge stairs, either via security office, or by unlocking the simple-locked room in 1F. On the first floor, look for a crawlspace. Enter the double doors beneath. An unfortunate bug may cause the game to freeze to all but one player here. Take your chances, and pick up the shotgun while ignoring the floor zombie.
Back in the security office, pick up the .45 ammo if Kevin is on the team, then go through the secret door next to the bust. Activate the emergency ladder, and explore the area before getting close to the exit. When you do, a boss battle begins.
# Boss battle: Regis licker
Regis licker has two attacks. She will do a tongue slash after receiving some damage; get away from her when she emits a larger screech. If you get too close to her, she will grab you by the neck, which will stun you for a while. In addition, four regular lickers will bother you. There is an alarm on the reception desk that will scare the lickers away whenever it’s activated; make good use of this.
The easiest way to beat this boss, by far, is to have Kevin continually potshotting it with his .45 auto. If not, the shotgun will do. Keep shooting at Regis licker until she falls to the floor. Approach the hotel entrance to end the scenario.